Moving from Aperture to Lightroom
What to do now that Aperture has been discontinued.


Apple recently announced the retirement of Aperture, their professional photo management and editing application. This is unfortunate news but not entirely unexpected, considering the lack of new features for several years prior to this announcement.
At this point there are two options going forward. The first option is to stick it out with Aperture until Apple releases the new Photos app next year, which is meant to replace both iPhoto as well as Aperture. The second option is to forego Apple’s products altogether and instead look at the competition. It is hard shaking the feeling that Photos will most likely be focused towards hobby users and amateurs, lacking the more advanced features currently present in Aperture.
There is really just one direct competitor to Aperture – Lightroom. Being a younger application than Aperture, its technical maturity is questionable, as well as its longevity. Since Adobe is the developer behind the app, I feel confident that it will be updated for the foreseeable future and have new features added continuously.
Switching to Lightroom means subscribing to the Adobe Creative Cloud. Instead of paying a premium for the software, you instead pay $10 a month for the photography bundle, which in addition to Lightroom also includes Photoshop. Having the monthly payment leads me to believe that the software is here to stay and that Adobe is committed to keeping resources assigned to the project.
The biggest step in switching software is the migration of photos from Aperture to Lightroom. I decided not to bother moving edits since there is always the possibility to open Aperture and find a specific image if necessary. That leaves only moving the master files.
In Aperture there is a feature called “relocate masters” which enables keeping the raw files on my NAS, separating the raw files from the library and freeing up precious disk space on my Mac. The raw files are exported using this hierarchy template:
//nas/Photos/YYYY/YYYY-MM-DD Project Name
If you shoot lots of projects each month it could be beneficial adding a current month level under each year as well, but I found it unnecessary and that it just added complexity after fiddling around with it.
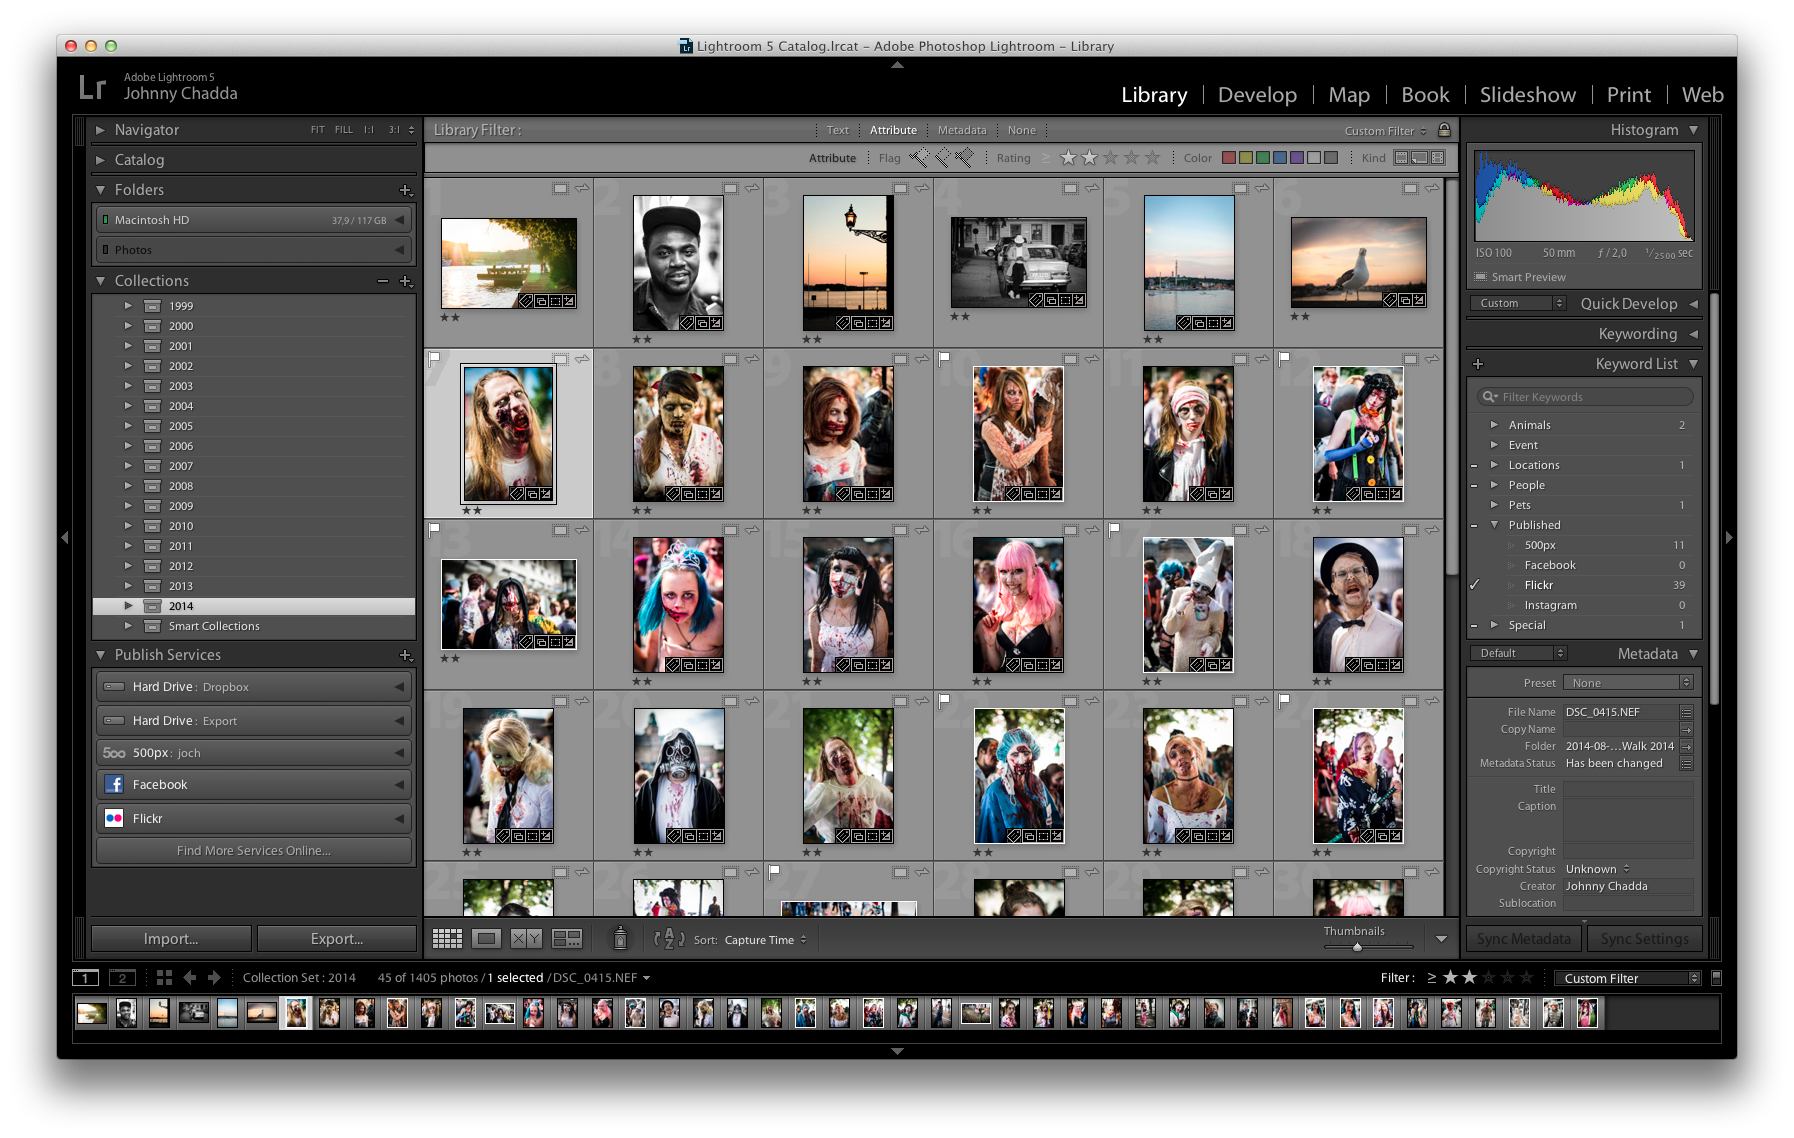
Now all I have to do in Lightroom is to mount the Photos share on my Mac and add it to Lightroom. All photos will be indexed automatically and smart previews are built, which are used when the NAS is disconnected.
New workflow
In Aperture, one will usually never touch the raw files themselves, but instead have them handled automatically behind the scenes ((Unless you keep your masters separate from the main library, but that is an advanced option and not in any way the default.)). All you need to care about are projects and folders containing projects. In Lightroom it’s a completely different story.
Farthest down is the filesystem level with image files and folders. This is where you define where Lightroom will find your photos. I basically have two folders, first the above mentioned NAS share, but I also have a local folder added which uses exactly the same hierarchy as on the NAS.
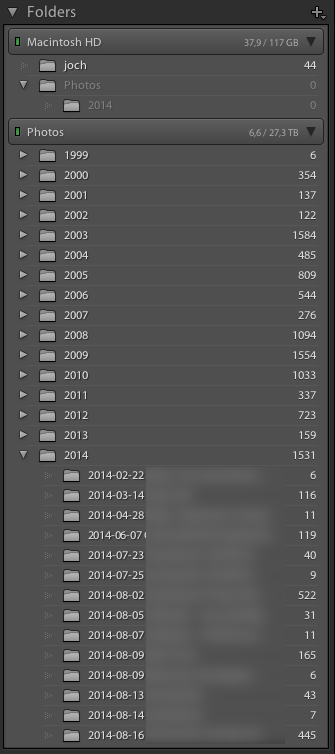
When importing photos from a shoot, I always import them to the hard drive on my Mac where they will reside until the project is finished. Once the files have been imported I create a corresponding collection, again with the same hierarchy. A collection set for the current year, containing a collection with all files from the corresponding directory.

When working with the photos, I always use the collections view, being readily available everywhere within the Lightroom workflow. Once the project is done however, all I have to do is to open the folder pane in Lightroom, find the 2014/2014-03-30 Example project and just drag it to the corresponding 2014 folder on my NAS.
The files will be moved by Lightroom freeing up lots of disk space, but the smart previews will still remain on the local disk. This means that it's possible to browse the collections normally without needing to have the NAS online and mounted all the time.
Backups
I am a CrashPlan user, and it is running on both on the Mac and on my NAS. This means that photos will immediately be backed up as they are imported. When a project is done and the folder is moved to the NAS, CrashPlan on the server will start backing up those files as well.
For critical projects, I tend to use the “copy masters” feature in the import dialog, providing an easy way to make a temporary copy of the masters to an external drive. The simplest way is to just refrain from formatting the memory cards before the project is properly backed up to be on the safe side.
The takeaway
Using this technique with relocating the masters in Aperture and importing those to Lightroom provides the best of both worlds. The photos still remain active in Aperture, and they are exposed to be made available in Lightroom at the same time.
I still consider myself a Lightroom novice, and it will be interesting to see how my workflow will change going forward, but most importantly how my post-processing chops will improve, given the more advanced features available in Lightroom.